> ## Documentation Index
> Fetch the complete documentation index at: https://docs.ascern.io/llms.txt
> Use this file to discover all available pages before exploring further.
# Set up your agency
> The settings an Owner or Admin sets once: time zone, money, your email domains, your team and two-step sign-in.
In this tutorial you set up an agency the way John Doe, the Owner of Saigon Talent, did on his first morning. You set the agency's defaults, check its email domains, invite the team and turn on two-step sign-in. It takes about 10 minutes.
## Before you start
* You are the agency's Owner or an Admin. Managers and Consultants don't see these settings.
* Skillflo has created your agency and you have signed in once. Hire is in a closed pilot, so there is no sign-up screen.
## 1. Set the agency's defaults
Open **Settings › General**. Each setting applies to everyone in the agency.
* **Time zone.** Today, due dates, reports and the Meetings calendar follow it.
* **Reporting currency.** Targets and the Dashboard show amounts in it. Jobs and Placements keep their own currencies, and Hire converts nothing.
* **Date format** and **Number format.** How dates and numbers read for anyone who hasn't chosen their own.
* **Phone country.** Numbers from this country show in their local format, and a CSV import reads a number without a country code as one from here.
* **Create and edit meetings in Hire.** Leave it off to only show each member's own calendar. Turn it on to let members and Flo make meetings from Hire.
## 2. Check your email domains
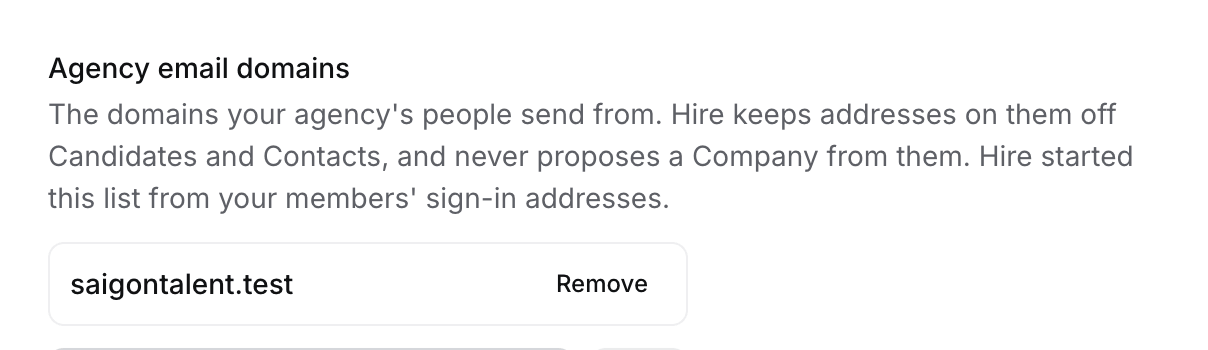 Under **Agency email domains**, Hire lists the domains your team sends from. It starts the list from your members' sign-in addresses. Hire keeps these addresses off Candidates and Contacts, so your colleagues never turn up as people to place. A domain you remove stays removed, even when someone from it joins. It moves to the **Removed** line, and **Add back** returns it.
Add a domain your team also sends from. Remove one that belongs to a client, for example when a contractor signs in with their client's address.
## 3. Invite your team
Open **Settings › Members** and select **Invite teammates**.
Under **Agency email domains**, Hire lists the domains your team sends from. It starts the list from your members' sign-in addresses. Hire keeps these addresses off Candidates and Contacts, so your colleagues never turn up as people to place. A domain you remove stays removed, even when someone from it joins. It moves to the **Removed** line, and **Add back** returns it.
Add a domain your team also sends from. Remove one that belongs to a client, for example when a contractor signs in with their client's address.
## 3. Invite your team
Open **Settings › Members** and select **Invite teammates**.
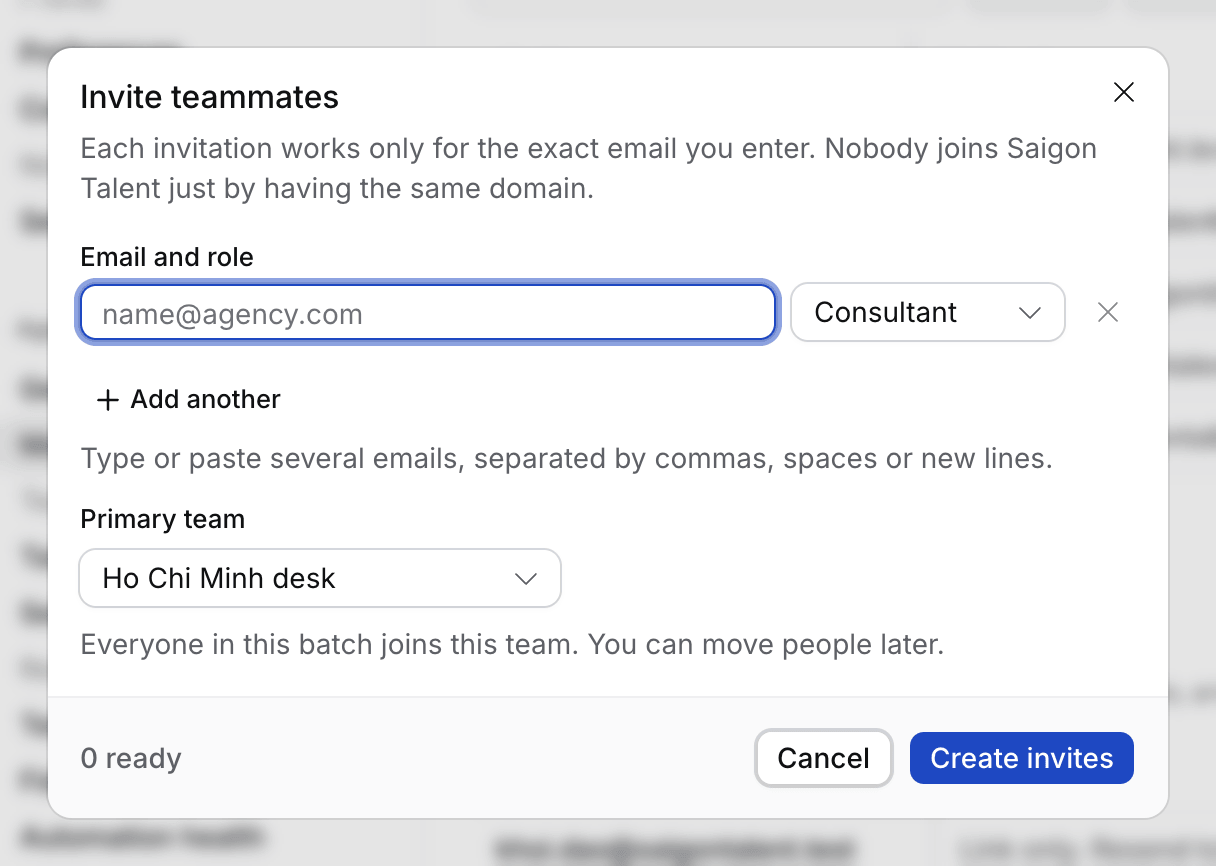 1. Type one or more work emails.
2. Pick a role. Owners and Admins run the agency's settings and members. Managers can also edit the Jobs and Applications of the people they manage. Consultants work their own. Everyone sees every record in the agency.
3. Pick their primary team, then select **Create invites**.
1. Type one or more work emails.
2. Pick a role. Owners and Admins run the agency's settings and members. Managers can also edit the Jobs and Applications of the people they manage. Consultants work their own. Everyone sees every record in the agency.
3. Pick their primary team, then select **Create invites**.
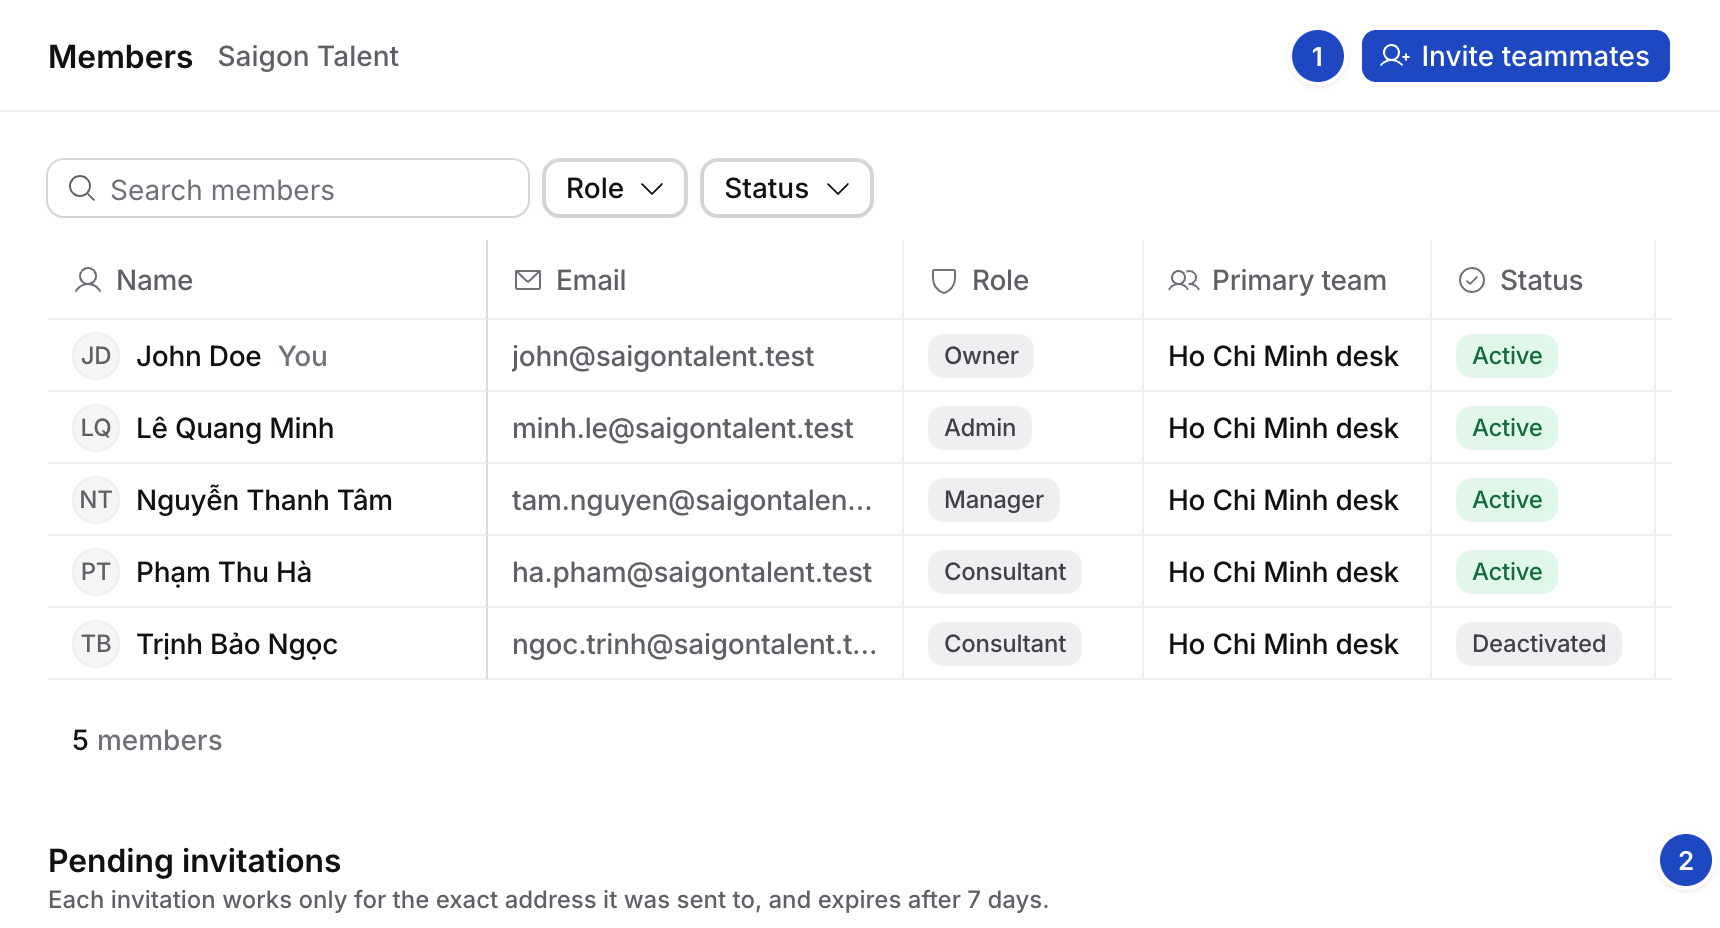 1. **Invite teammates.** Opens the dialog above.
2. **Pending invitations.** Each invitation works only for the address it was sent to, and expires after 7 days. **Resend** sends it again and **Revoke** cancels it.
## 4. Turn on two-step sign-in
Open **Settings › Security** and turn on **Require two-step verification for everyone**. Every member, Owners and Admins included, then enters a code from an authenticator app after their email code. The table shows who has set it up. Admins see only the status, never a member's codes.
Set up your own first, in **Your account › Sign-in and security › Add authenticator**. Save the backup codes Hire shows you. If you lose your phone, a backup code signs you in.
## 5. Set your house style
Open **Settings › Templates**. Add your logo and colours under **Brand**, and your usual layout under **Job description** and **Submission email**. Flo uses them for every JD, CV and email it writes. Under **CV templates**, Hire's built-in format is the default until you add your own.
## What you did
Your agency now reads dates, money and phone numbers your way, keeps colleagues out of your candidate list, and asks everyone for a second sign-in step. Your team has invitations waiting.
## Next
Import your jobs, clients and candidates before you connect anything.
Every first-day step, in order.
This documentation is built and hosted on [Mintlify](https://mintlify.com), a developer documentation platform.
1. **Invite teammates.** Opens the dialog above.
2. **Pending invitations.** Each invitation works only for the address it was sent to, and expires after 7 days. **Resend** sends it again and **Revoke** cancels it.
## 4. Turn on two-step sign-in
Open **Settings › Security** and turn on **Require two-step verification for everyone**. Every member, Owners and Admins included, then enters a code from an authenticator app after their email code. The table shows who has set it up. Admins see only the status, never a member's codes.
Set up your own first, in **Your account › Sign-in and security › Add authenticator**. Save the backup codes Hire shows you. If you lose your phone, a backup code signs you in.
## 5. Set your house style
Open **Settings › Templates**. Add your logo and colours under **Brand**, and your usual layout under **Job description** and **Submission email**. Flo uses them for every JD, CV and email it writes. Under **CV templates**, Hire's built-in format is the default until you add your own.
## What you did
Your agency now reads dates, money and phone numbers your way, keeps colleagues out of your candidate list, and asks everyone for a second sign-in step. Your team has invitations waiting.
## Next
Import your jobs, clients and candidates before you connect anything.
Every first-day step, in order.
This documentation is built and hosted on [Mintlify](https://mintlify.com), a developer documentation platform.